Don’t Make a Mole Hill into a Mountain ~ Trapping Moles
Moles are one of the most interesting animals I work with. They are the most secretive of the burrowing animals found in gardens and lawns – they rarely show themselves. They almost never come out of the ground and will choose to dig under a road rather than just cross it like gophers and voles would. They have complex tunnel systems with deep tunnels and surface mounds leading to nest cavities, areas where they find food, and highways to nearby alternate food gathering areas.
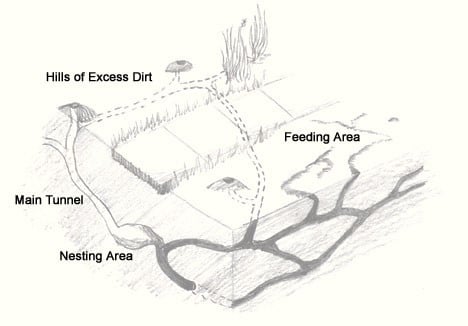
The volcano shaped mounds moles make are often confused with gopher mounds; but gopher mounds always have a visible plug and the mound is usually crescent shaped. Mole mounds are round, as a column of soil is pushed straight up out of the ground and then topples over to create the volcano shape.
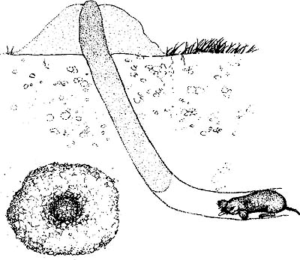
The most interesting thing about the mole is the incredible adaptation it has made over thousands of years that enables it to be an underground tunnel-digging animal. Huge shovel-like hands powered by large muscles running down its back seem almost grotesque but allow this animal to dig the length of a football field in one day or swim just under the soil surface in search of food. Mole fur has no nap and is like a thick, soft brush making it possible for this creature to go forward or backwards in a tunnel. This fur is so luxurious that for years it was made into coat collars and used to soothe foot maladies like corns and warts. Ever wonder why those synthetic foot protectors are called Moleskin?
A mole’s eyes were probably once a main means of getting around, until centuries of tunneling shrunk them into tiny dots underneath the skin. The sensitive nose and whiskers or even star-shaped snouts became the main navigator, using smell and vibration to find a meal. Speaking of meals, moles eat about half their weight per day consuming earthworms, grubs and almost any soil dwelling bug. Their saliva contains a toxin that paralyzes their prey that they store in a special food cache. Plants are rarely on the menu making moles an asset in some cases instead of a problem. In fact, in most garden and farm environments I recommend leaving moles alone and often teach people how to discern gopher versus mole mounds.
Moles get around and are thought to have originated in Eastern Europe and migrated across ancient land bridges to the Americas, England and Africa. All that traveling has led to twenty different species, even some that swim. In the United States we have moles on the Eastern side and on the Western side but none in the dryer middle states.
Mole Damage
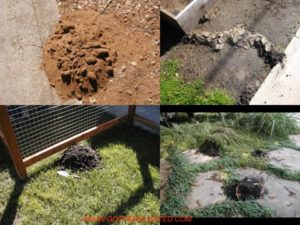
As moles do not eat plants most mole damage consists of large piles of soil and shallow tunnel trails right under the surface. Sometimes moles can cause havoc on a newly planted garden or bulb area following a heavy watering area or drip line. Moist soil areas attract worms, and worms attract moles. Another form of mole damage is that they often tunnel under brick or paver patios and paths, undermining and unsettling stones and causing them to drop down and/or cave in.
Anti-Mole Treatments and Barriers
Since moles prey on insects in the earth there are ways to spice things up a bit so moles do not find the area very appetizing. For many years the main mole deterrent has been castor oil based formulas. Castor oil is bitter (Mom used it as a cold and flu remedy when I was a child) and has staying power in the soil to be effective for a long period of time. It may come in a bottle that attaches to your garden hose, or absorbed in a polymer that releases the oil when you water. It is non-toxic to plants, kids, and pets so it is very safe to use. You can even buy organic castor oil in natural food stores for less than you would find the same product in the hardware store. Today castor oil is back in style but mostly used as a colon cleanser.
There are other products such as mint oils, peppers and such but castor oil has proven more effective in my experience. When you are purchasing a liquid castor oil product be sure to read the label and buy one that has the highest castor oil percentage, it should be the same price.
Another method I have often seen in huge variety are sonic repellers. These range from $40 deluxe models all the way down to my Mom’s favorite, the 25 cent pinwheel.
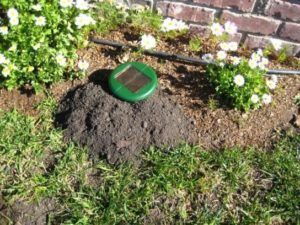

I have heard a lot of anecdotal talk of a mole’s departure as soon as one was installed. I have heard that these devices can have a calming effect on those plagued by mole issues and may be therapeutic – everyone knows cheap therapy is not always as good so the more you pay for one of these, the better you might feel. As far as effectiveness I don’t know of any scientific data. The jury is still out on that and it seems to me moles are not bothered although some may find it annoying enough to go elsewhere.
Another method is to install a physical exclusion barrier. This can be very worthwhile if done right and can be a waste of money if done wrong. Starting with the right wire mesh will ensure that what you do will last. Aviary and chicken wire will not last long at all. The best wire is a product made for this called ‘gopher wire’ sold rolls and having a 3/4 inch mesh. It is made of galvanized or stainless steel. If you have heavy, loamy soil you want to get the stainless if possible. Heavier soils tend to be more acidic and will eat through thin or lightly galvanized wire easily. Stainless steel will outlast all but is twice as expensive. Like most things, using a higher quality product will give longer lasting results. Another wire that is often used is 1/2 inch hardware cloth. It is more expensive than gopher wire but often it is the only wire available.
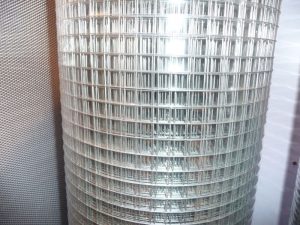
Gophers Limited Stainless Steel ¾” Square Wire Mesh

½” Hardware Cloth
It is important to have the wire installed at the right depth. If it is too shallow, moles will just push up soil through it and the tunnels will leave trails of grass that can’t get enough water. The wire should be about 2 inches below the sod and no deeper. If the wire is placed too deep, then moles will live above it. So either do it right or don’t do it at all.
Trapping Moles
If you find that all the above methods fail you can use traps. In most cases you are after one, maybe two animals. It can look like several but moles are busy diggers and have the ability to tunnel 300 feet in one day. They are always on the move, looking for the next live meal so they pop up here and there often in one or more adjacent yards. Your job is to identify a pattern and use it to intercept this shrewd animal.
The tools for trapping moles are numerous and varied. Moles have two characteristic burrows: deep tunnels, marked by steep volcano shaped mounds, used to move from one feeding area to another and surface feeding burrows where they practically swim just under the surface and leave a raised bump trail. Moles eat live earthworms and are not the kind of animal that will be drawn to bait. Some traps, as the Victor Harpoon, are designed for the surface burrow and skewer the animal when it goes by. The trapper’s job is to trap or snare the mole as it moves along the tunnel. Moles tend to use the deep tunnels as freeways to travel to feeding areas like moist garden beds, lawns and especially oak groves because the leaf litter is an excellent mulch that attracts worms. The most used tunnels are the deep ones that are routes from one area to another. Intercepting a mole in these areas is the most effective way to catch them.
Deep Tunnel Trapping Moles
Finding a deep tunnel is easy; just look for the volcano-like mounds and probe around them until you feel your probe sink into an air space. The mounds are lateral tunnels off the main trail and are there just to rid a tunnel of soil in convenient areas so the mole does less backtracking. Sometimes next to a road you might find a huge pile of soil. This is because the mole must continuously keep coming back to the side of the road it started at to get rid of soil until finally it gets to the other side. You can also see this along walkways, patio edges or foundation slabs. These under-road pathways are used frequently and provide a good trapping site. Moles will also follow along a house foundation, another good trapping location. Many of the deep tunnels, especially ones that go under paths and roads, become access ways for other moles therefore are excellent trapping areas in the event of a secondary invasion.
So you now have a trapping site — which trap to choose? There are two schools of thought about this. One is to dig a large hole and expose the two or more tunnels and set your trap in this excavation to intercept the mole; two is to make a small opening from the surface and use a trap that has a long reach into the tunnel. I prefer the surface trapping technique as is less disruptive to the lawn or landscape. However the first technique may require less traps or resetting. The first technique goes like this: probe around mounds until you feel your probe sink in. Probe a little more to get a good feel for the direction of the tunnel. With a spade dig around the tunnel, trying to keep the turf block you are removing intact so you can replace it in the end. The size of the excavation should be about a spade’s width or six to eight inches across. Then clean out the tunnel openings and set your trap into the tunnel.
There are many traps available for trapping moles, pincer types and grasping types but the two traps I prefer are the Cinch Mole Trap and the Gophinator.
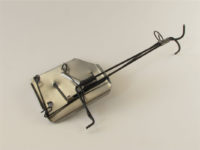
Cinch Trap

Gophinator
I almost always use the Cinch Mole Trap because it fits in the burrow opening so well and it is easy to get the jaws to settle into the soil so the mole does not easily feel this strange object in the tunnel. Moles are wary creatures and are said to be sensitive to iron, so getting the trap to be less obvious is always a good strategy. I insert the Cinch Trap, which has a long reach, into the burrow, settle it around a bit to hide the jaws and set the trigger in its least sensitive position. Most traps have some trigger sensitivity options but the Cinch enables you to allow for a whole half inch of play allowing the mole to push some soil into it before it springs.

Set for moles

Set for gophers
Put some loose soil into the hole to block the light and wait a day and check the trap. Another huge advantage of the Cinch Trap is that the spring plate is about eight inches from the jaws of the trap so you can monitor the trap without removing it from the burrow. When you check the trap and it is sprung indicating the mole was caught you may be done. However, often the trap may be sprung by the column of dirt the mole pushes in front.
When using the Gophinator trap or other pincer trap types the set up is the same except the trap will be completely in the burrow with some string or wire attached to the trap so you can pull it out. You will have to pull the trap out to check it and then reset if needed.
Surface Tunnel Trapping Moles
Trapping moles in those raised, just under the surface tunnels can be quite easy, especially if you can find the tunnel that is used most often. Often you can find these tunnels along walkways, edges of lawns, and foundations. These are great locations to set up traps going in both directions to get your mole.
To do this simply stomp down a portion of the tunnel in several places and check the next day to see if it is raised again. If it is you have found one of the main routes. Like the deep trapping method, there are many traps available and I have tried them all and found a few that I have had the most luck with.
Again, the Cinch Mole trap has proven its versatility in this kind of trapping mostly due to its long reach, adjustable trigger and easy monitoring. I find the active surface tunnel, clean out any extra soil and insert a trap in each direction. Wait a day or two and check the traps and reset if needed.
The most common mole trap found in hardware stores is the Victor Harpoon.
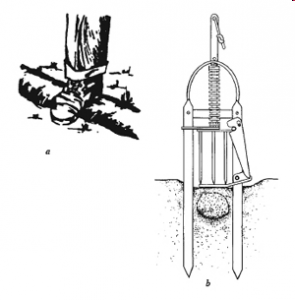
This trap was designed specifically for surface mole tunnels. It is a tall trap with a strong spring and two sets of long tines that spear the mole when coming from either side. The set-up is fairly simple. Locate the active surface tunnel. Press it down with your heel and push the unset trap down to make sure the tines can smoothly penetrate the soil. Then carefully pull back the spring, set up the trigger and place the trap in the same holes as before. Be very careful to push the trigger pan into the depression left by your heel and monitor the trap. When the trap is sprung dig around the tines before you pull it up to ensure your catch is there. I have seen many people just pull the trap up leaving the caught mole in the soil thinking it was a miss.
I have used this trap alongside the Cinch Mole Trap to vary trapping methods. The most important strategies to employ when trapping moles are observation and persistence. These are wary and clever animals and you will need to outsmart them.
Another strategy I use is trap density: I put out many traps in different conditions to catch one mole.
Once you have caught a mole, you may have completed your mission. Or you may have to persist until all activity stops. It has been my experience, in Central California, that usually there are one to three moles in a typical residential lot. In larger lawns and greenbelts, especially near oaks, it can be a constant battle. – Thomas Wittman
